Tuesday, September 30, 2014

Awards and "Jobs" for Students

One way to help students with positive reinforcement is with rewards. Some teachers use point systems, where every book read, ever question answered, and every participation opportunity is worth a certain amount of points. At the end of the week, month, or whatever amount of time, students can trade their points for things like books, toys, and snacks.
Another reward method is with special tasks or actions as the reward. This includes pieces of paper in a jar from which the student can pick. The paper has actions on it such as: Lead the line to lunch, hand out worksheets, chew gum in class, take shoes off for  a period, and other actions the teacher comes up with. Here are a few I created for a school project:

Sorry about the picture quality, but my normal camera needs batteries!


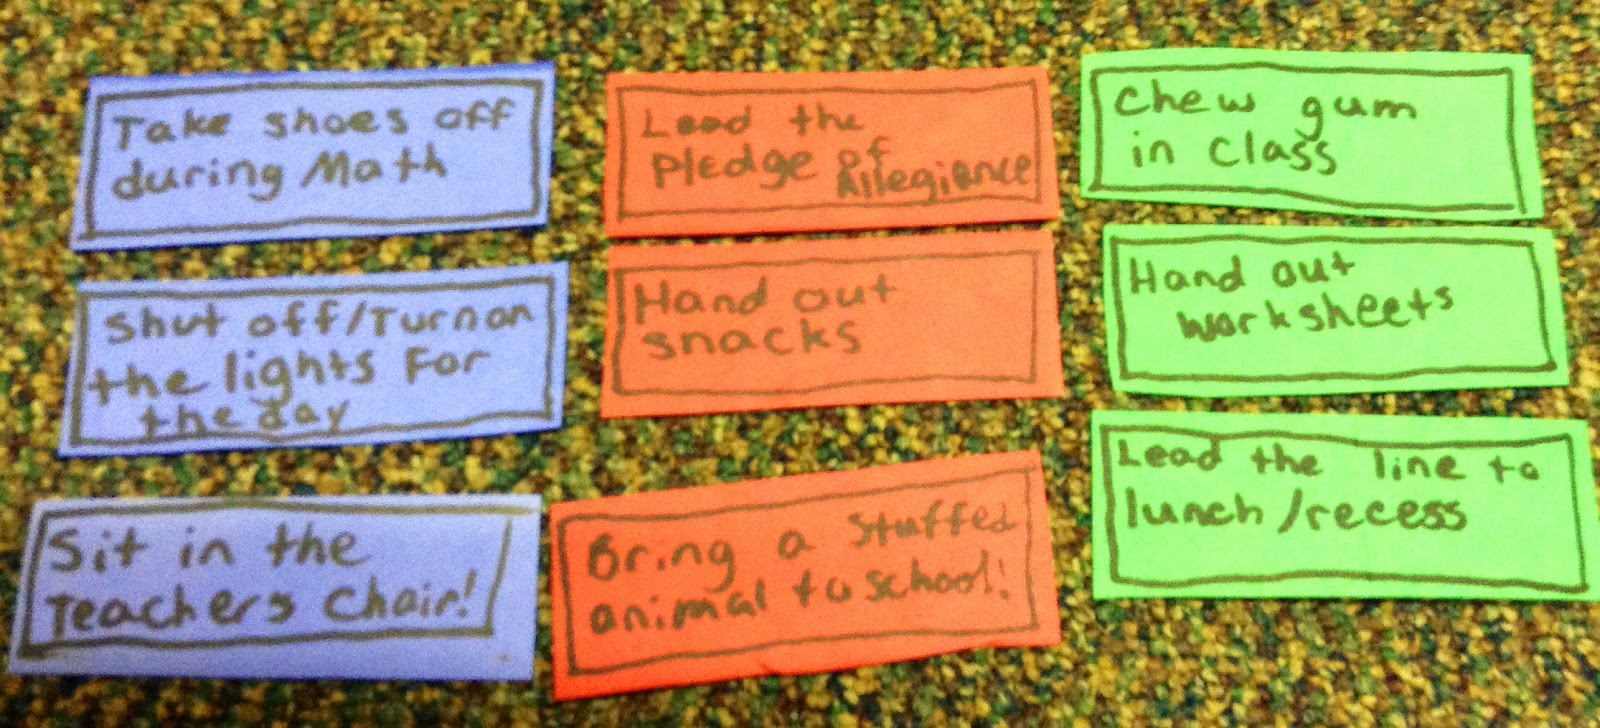
I did find some of these on Pinterest. The cards can be created by hand, like I did, or made in Word or PowerPoint. I recommend PowerPoint  because it is SO MUCH easier to create fun things like this (also, if you want to make any worksheets, PowerPoint works better than Word). 

Any of these rewards can also be jobs assigned to students. I remember back in 2nd grade having a different job every week. My very first job was Chalkboard Eraser. I didn't get to be Line Leader until the end of the year! 

Here is a really fun resource for classroom tasks/rewards: 

As always, any corrections, modifications, or comments are welcome! Thanks for reading, and have a great day.


Thursday, September 25, 2014

Completing the Circuit: STEM Education Activity

Fig.1
Fig. 2
I recently did an activity that demonstrated the flow of electricity. Not having much background knowledge on the subject, I found this activity to be very helpful. I still don't have all the information about electricity  that I would like to have, but I thought this activity would be great to include in a science lesson.

This is a very simple activity, and there are many follow-ups to it. 

This activity is designed to demonstrate the current of electricity flowing through a light bulb. After this activity, Students will be able to explain how to get a light bulb to light up and why a closed circuit is needed. A good connection to make is to a flashlight, since the elements of the activity are the same as those in a flashlight.

Materials:
  • Flashlight light bulb (4.5v, 3amps)
  • AA battery
  • copper wire (I used copper wire in plastic casing with two jaw clamps attached to each end, but all you really need is the wire)


Background information:
In order for a light bulb to light up, there must be an unbroken flow of electricity. This means that the circuit must be closed in a circle. If the circuit is open, the electrical current will stop where the circuit ends.

Procedure:
Fig. 3
The goal for this activity is for the light bulb to light up. Ask the students to try it on their own. It may be a good idea for the students to have a little background information before beginning this activity.

Connect one end of the copper wire to the screw contact on the light bulb. connect the other end to the tip of the positive end of the battery (Fig. 3). Touch  the foot contact of the light bulb to the negative end of the battery (Fig. 4). It will light up. If it doesn't, you may need a larger battery or a light bulb with fewer watts.


Fig. 4


The wire conducts electricity from the battery to the light bulb. Electricity travels up one support wire, through the filament, and down the other support wire. This is how electricity travels in and out of the bulb. However, the electricity flow will stop at the end of the wire unless the circle is closed. When the bulb touches the other end of the battery, electricity can flow freely through the circle.

Follow up activities: Show the inside of a flashlight and ask students to name some of the elements. 
You can also make a flashlight if you have time and resources. HERE and HERE are some simple how-to on making flashlights. They're not in the form of classroom lessons, but I thought they would be pretty cool to do in the classroom.

Other sources:

Wednesday, September 24, 2014

Story Map for Book: The Lotus Seed by Sherry Garland

I created a lovely little story map as an exercise for my Children's Literature class. The book I chose is The Lotus Seed by Sherry Garland.

A little about Story Maps:
A story map is a visual aid to help students understand a little more about the different mechanisms of books. There are 5 items that should be included in a story map (though you don't have to be limited by these items). They are: title/author (these are two items, but should be viewed as one), characters, plot, setting, and theme.
The title/author is just what it seems. When creating the story map, students should know that the title and author are two very important parts of the book.
Students don't have to list all the characters, just the main ones. To go further, students can categorize the characters into those with major roles and those with minor roles.
The plot is really three parts, though only two are really required for a story map. These are the conflict and resolution. Be sure to ask the students what the problem in the book is instead of just telling them. For example: "What happens in the book that is not so good?" "What goes wrong?" or simply, "what is the problem?" are good questions to ask. Another element to add to the plot is the event. What event sets the story into motion? In the book The Lotus Seed, the event is the emperor losing his golden dragon throne.
The setting is where the story takes place. Is it, for example, in a park, a classroom, or a basement?
The theme is always inferred, told straight out. This means that it is obvious. It is the big idea, moral or importance of the story. It recurs throughout the story. Some common themes are family, friendship, and life lessons.

Here is the story Map I created for the book The Lotus Seed. 


This isn't set up like a lot of story maps. I didn't title the plot, but instead put in the conflict and resolution. Also, I realize too late that I did not include a setting.  This is OK. The setting is not the most important element of a story map.

Here is a cut-out of the leaves I used for the Lotus flower. It folds in the middle so that it can open up.
I cut a bunch of these out and glued the tabs to the paper. DO NOT glue the whole back of the leaf to the  paper. 

The words do not have to be type-written. The can just as easily be written on the leaves. This is just how I did my story map; you can do whatever you want to change or improve it.


I hope you enjoyed this introduction to story maps. If there is something I forgot to add or anything I did that needs improvement, let me know! Also, if you would like to leave links to your own education blogs or websites, feel free to do so (I am hoping that any links will be HELPFUL so if you post a link just to get more traffic and your website really has nothing to do with crafts or education, I may remove it). 

Some other resources:
Story Map
Mrs. Goff's PreK Tales

The Purpose

Greetings! This blog has been created to serve as a resource for myself, other educators, and anyone who feels the need to look for creative ideas for education. Basically I need a place to store links, ideas, and tutorials. WARNING: I rely heavily upon Pinterest.

A little about myself: I am currently in the process of becoming an elementary teacher. Yes, I am still in college. This is my third year (2014). I really love crafts, and I can hardly wait to begin teaching. I also crochet, so I may once in a while post a crochet pattern or two.

 The reason I decided to create this blog is because I keep finding tons of lesson plans, crafts, and resources for teachers, and they are ALL OVER THE PLACE. I can't keep ten different folders on my computer and 23,900 bookmarked websites. It's too much to take in!

This Blog is not just for teachers! It is for parents, babysitters, and bored crafters. If you are a homeschooler, particularly of younger students, this might be a good place for you to visit.  I will post pictures of crafts and activities, lesson plans, and maybe youtube tutorials, depending on whether or not I get the time to make them. There will definitely be links to other websites where I have found my ideas.

I welcome resources and suggestions, so if you have anything to add, please do! I am (right now) just a college student, so I need as much help as I can get! I would appreciate it if you would share your own ideas, websites, or comments. 

I will hopefully be posting later today, as I have a wonderful story map that I created for Children's Literature that I would love to share with the world.


01 09 10