Tuesday, October 21, 2014

Math Lesson Using How may Snails? by Paul Giganti

http://img1.imagesbn.com/p/9780688136390_p0_v3_s260x420.JPG
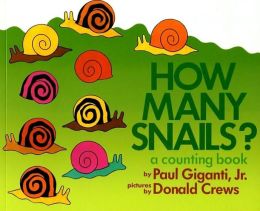
I read a counting book recently called How Many Snails? by Paul Giganti and I wondered: What if students could write their own How Many book? This is a great book and there are some great lessons to teach from it, but why just read the book? Why not create your own page for the book? I decided to see how well it would work, and I think it would be pretty easy.

Read the book.
Have the students make charts/Venn Diagrams detailing one page in the book.
Have the students draw their own page(s).
Have the students make a chart/Venn diagram on the BACK of their page.
Make all pages into a classroom book!


Should I add more? 

Wednesday, October 15, 2014

Author's Purpose for Writing

I want to say a few words about PIE. That is, the Author's Purpose for writing, which is to Persuade, Inform, and Entertain.


https://blogger.googleusercontent.com/img/b/R29vZ2xl/AVvXsEh5rvA3uxPbIosFFG8cPeaW7VjRIi9v43Yw59ZQQDHf8yQooOUqHqDCnWvhI74NJk2NZmnfWtWncDPM45ytspwCsneHXk2keCucMLaVMD41eDyNSRmrOgU8oMIdAp-EG6kWuDx_TygQ5mo/s1600/IMG_8557.JPG
There are some pretty easy activities involving PIE. Show students examples of each purpose, and ask them to explain which purpose the author uses. Is there perhaps more than one purpose in the text? Here is a prezi on PIE with a couple of activities near the end:
Author's Purpose Prezi

Here is a kind of worksheet that could be used to demonstrate the author's purpose:
Study Zone PIE

Here are some standards that go along with teaching about PIE:

Grade 1
CCSS.ELA-Literacy.RL.1.5
Explain major differences between books that tell stories and books that give information, drawing on a wide reading of a range of text types.
 CCSS.ELA-Literacy.RI.1.6
Distinguish between information provided by pictures or other illustrations and information provided by the words in a text.
Grade 2
CCSS.ELA-Literacy.RI.2.6
Identify the main purpose of a text, including what the author wants to answer, explain, or describe.
Grade 3
CCSS.ELA-Literacy.RI.3.1
Ask and answer questions to demonstrate understanding of a text, referring explicitly to the text as the basis for the answers.

You can find all the standards
Here

Thursday, October 9, 2014

Math Activity Using Play Dough and Stickers

I recently went to a school  for a practicum, and was asked to do a lesson with the K-2 students (it was a multi-grade classroom setup). I prepared a Math lesson. I gave each student play dough (homemade play dough recipe coming soon!), and we practiced making numbers with it. For the K students, we just made numbers with the play dough. For the 1 and 2nd graders, we did addition facts where they had to make the answers using play dough. The second part of the lesson was writing ages on worksheets using star stickers. For K, I just had them put down their age in stars and then write their age below that. For 1st grade, they had to come up with [their age + what number = 10?]. For 2nd grade, the students had to make an addition fact that added up to their age. For example, one of my students is 8 years old. He made 4+4 using his stars.
I had extra stickers for the kids to decorate their pages. I think that was a really good idea. They loved having extra stickers.
Here is my lesson plan. It includes standards:

Math activity for grades K-2

Materials:
·      Math worksheet (provided)
·      Star Stickers
·      Other decorative stickers
·      Play dough

Kindergarten:
Guided practice: Making numbers with play dough—Make any numbers between 1 and 10. The last number to make is the students’ age.
Independent practice: Placing age in stars on worksheet—The students pick out the nu ber of stars equal to their age and place it on the worksheet. They then write their age on the bottom line.

CCSS.Math.Content.K.CC.A.3
Write numbers from 0 to 20. Represent a number of objects with a written numeral 0-20 (with 0 representing a count of no objects).

1st grade
Guided practice: Making addition fact answers with play dough—have the students make the answers to addition facts such as 4+4, 8+8, 10+10, and other addition facts between 1 and 20.
Independent practice: Age + ? = 10 with stars—students place their age in stars on the first line. They must then figure out how many more stars they need to make 10, and place that number on the second line.

CCSS.Math.Content.1.OA.B.4
Understand subtraction as an unknown-addend problem. For example, subtract 10 - 8 by finding the number that makes 10 when added to 8.


2nd grade:
Guided practice: Making addition and subtraction facts with play dough—addition within 20 such as 5+5, 8+9, 10-6, and others within 20.
Independent practice: ? + ? =age with stars.

CCSS.Math.Content.2.OA.B.2
Fluently add and subtract within 20 using mental strategies.

Kindergarten Worksheet. I did this one, and that is why there are 10 stars.


1st grade worksheet
2nd Grade Worksheet


Play Dough
Play Dough 0
Play Dough 19
Kindergarten
1st Grade
2nd Grade
Have some extra stickers for the kids to use to decorate their worksheets. They love the stickers!

Questions? Did I not explain well enough? Comments are appreciated! Have a wonderful day and Happy teaching!

Monday, October 6, 2014

Math Walls

I recently created a Math wall for a class. I found many interesting ideas. I want to share some ideas for what to put on a Math wall.

Here is the Math wall I created:


What I included in my Math wall:

  •   A number of the day-- this is common on most Math walls. It allows for more information on that number to be placed on the wall. 
  • Number sentences-- this is a place where students can make number sentences for the number of the day
  • Yesterday is/Today is/Tomorrow will be-- this is also common on many math walls. It is part of the calendar part of the math wall. you can choose to put more calendar items on your Math wall; I did not because I didn't have room. 
  • 100s chart-- I have never seen a Math wall that did not have a 100s chart. 
  •  Prime Numbers/ odd & even numbers: I added these because I thought they might be important. There are many activities that involve prime numbers and odd/even numbers. 
  • Clock-- my clock (which I had fun making) has moving hands so that students can demonstrate different times. I used this feature to teach about different time zones. Students demonstrated what time it was in other parts of the world. 
  • piggy bank-- I used my piggy bank to teach about coins. Students can add up coins to get the number of the day. I like this activity because there can be more than one way to get the right answer. 
  • Written number of the day: This is just the number of the day written in word form. 
A Math wall should be interactive. It should have moving parts. You can achieve this with
  • sticky notes
  • Paper clips
  • Laminated sheets
  • velcro
And many other items. Some other ideas for you Math wall include:
  • Interactive calendar
  •  Digital date
  • Fractions for the word of the day
  • Greater than/less than
  • Students can paste sentences up using the word of the day ("I have 18 dolls", "I saw 18 cars", Ms. Kjos has 18 students in her class"). 
  • Birthdays 
For the number of the day, you could add a laminated sheet such as this one (or create your own!)
:


Be creative! Kids love creativity. Something I thought would be cool is to have students brainstorm features to put up on the Math wall. Each week or month could feature a different student's or group's idea.

Sources:
Room Mom's Math Walls

Ideas? Suggestions? What would you like to talk about? Share your ideas!


Friday, October 3, 2014

Halloween Crochet Patterns!

I mentioned in my very first post that I might do a crochet pattern or two. I am kind-of doing that. I don't want to reinvent the wheel, so I'm just going to link the sites where I found the patterns. I had a lot of fun doing these, and each one took me half an hour or less.


Crochet Skull Pattern Link

For this pattern, I used black to start, and thus made the eyes. I then switched to white. When it came time to do the teeth, I switched to black again. This is where the pattern ends, but I added a row of single crochets around the teeth. I like it this way, but it is not required. You can do whatever color(s) you want. I think it would be fun to do a bunch for the Day of the Dead.


Crochet Spiderweb Pattern Link

For this pattern, I crocheted 8 rows. You can do as many as you like, it will look awesome no matter what. I added the strings, which are nothing but chains attached to the double crochets.  It doesn't matter how many chains you make on each string, or where you place them just be sure to stagger them unevenly to get the cobweb effect.


Crochet Pumpkin Pattern Link

I messed around with this one a lot. I didn't like just two rounds, so I added a third. I made another and added a fourth row, but I didn't like that one as much.


Thursday, October 2, 2014

Worksheets Tutorial and Math Worksheets

Happy October!
I recently learned an important lesson (which I think I mentioned in a previous post): Don't make worksheets in Word. I mean, have you ever tried to make fun worksheets in Word? It's much easier to put it in PowerPoint, because then you can add all sorts of fun things to it, like borders and clip art. Today I'm going to show you some worksheets I made for math on fact families. My theme is seasonal/holiday fact family worksheets. I made a tutorial in case you don't know how to do some of the stuff in PowerPoint. If you already have plenty of background knowledge for PoewerPoint, then I suggest you skip the Tutorial. :)

I should right away say that this is not an original Idea. I found a fact family craft on The Razzle Dazzle Classroom and I thought it would be a cute idea. I made one (right), and it was pretty fun. It's supposed to be for a valentines day activity, since the petals are made out of hearts, but I think you could use it for any day.


 To start, here is a PDF version of the Math worksheets I created.
Math Worksheets

And here is the Tutorial:


I highly encourage experimenting. Try making a story map in PowerPoint. Try some other subjects. I like embellishing my worksheets with clip art. It makes the pages more friendly.

Check out the Razzle Dazzle classroom. There are some great activities for teachers there, and I think it's a great resource.

I 'd like to thank Dr. Sheri Okland for teaching me how to make worksheets in Powerpoint. I would be fighting with Word still if she hadn't. 

Have a wonderful day and Happy Teaching!

Tuesday, September 30, 2014

Awards and "Jobs" for Students

One way to help students with positive reinforcement is with rewards. Some teachers use point systems, where every book read, ever question answered, and every participation opportunity is worth a certain amount of points. At the end of the week, month, or whatever amount of time, students can trade their points for things like books, toys, and snacks.
Another reward method is with special tasks or actions as the reward. This includes pieces of paper in a jar from which the student can pick. The paper has actions on it such as: Lead the line to lunch, hand out worksheets, chew gum in class, take shoes off for  a period, and other actions the teacher comes up with. Here are a few I created for a school project:

Sorry about the picture quality, but my normal camera needs batteries!


I did find some of these on Pinterest. The cards can be created by hand, like I did, or made in Word or PowerPoint. I recommend PowerPoint  because it is SO MUCH easier to create fun things like this (also, if you want to make any worksheets, PowerPoint works better than Word). 

Any of these rewards can also be jobs assigned to students. I remember back in 2nd grade having a different job every week. My very first job was Chalkboard Eraser. I didn't get to be Line Leader until the end of the year! 

Here is a really fun resource for classroom tasks/rewards: 

As always, any corrections, modifications, or comments are welcome! Thanks for reading, and have a great day.


Thursday, September 25, 2014

Completing the Circuit: STEM Education Activity

Fig.1
Fig. 2
I recently did an activity that demonstrated the flow of electricity. Not having much background knowledge on the subject, I found this activity to be very helpful. I still don't have all the information about electricity  that I would like to have, but I thought this activity would be great to include in a science lesson.

This is a very simple activity, and there are many follow-ups to it. 

This activity is designed to demonstrate the current of electricity flowing through a light bulb. After this activity, Students will be able to explain how to get a light bulb to light up and why a closed circuit is needed. A good connection to make is to a flashlight, since the elements of the activity are the same as those in a flashlight.

Materials:
  • Flashlight light bulb (4.5v, 3amps)
  • AA battery
  • copper wire (I used copper wire in plastic casing with two jaw clamps attached to each end, but all you really need is the wire)


Background information:
In order for a light bulb to light up, there must be an unbroken flow of electricity. This means that the circuit must be closed in a circle. If the circuit is open, the electrical current will stop where the circuit ends.

Procedure:
Fig. 3
The goal for this activity is for the light bulb to light up. Ask the students to try it on their own. It may be a good idea for the students to have a little background information before beginning this activity.

Connect one end of the copper wire to the screw contact on the light bulb. connect the other end to the tip of the positive end of the battery (Fig. 3). Touch  the foot contact of the light bulb to the negative end of the battery (Fig. 4). It will light up. If it doesn't, you may need a larger battery or a light bulb with fewer watts.


Fig. 4


The wire conducts electricity from the battery to the light bulb. Electricity travels up one support wire, through the filament, and down the other support wire. This is how electricity travels in and out of the bulb. However, the electricity flow will stop at the end of the wire unless the circle is closed. When the bulb touches the other end of the battery, electricity can flow freely through the circle.

Follow up activities: Show the inside of a flashlight and ask students to name some of the elements. 
You can also make a flashlight if you have time and resources. HERE and HERE are some simple how-to on making flashlights. They're not in the form of classroom lessons, but I thought they would be pretty cool to do in the classroom.

Other sources:

Wednesday, September 24, 2014

Story Map for Book: The Lotus Seed by Sherry Garland

I created a lovely little story map as an exercise for my Children's Literature class. The book I chose is The Lotus Seed by Sherry Garland.

A little about Story Maps:
A story map is a visual aid to help students understand a little more about the different mechanisms of books. There are 5 items that should be included in a story map (though you don't have to be limited by these items). They are: title/author (these are two items, but should be viewed as one), characters, plot, setting, and theme.
The title/author is just what it seems. When creating the story map, students should know that the title and author are two very important parts of the book.
Students don't have to list all the characters, just the main ones. To go further, students can categorize the characters into those with major roles and those with minor roles.
The plot is really three parts, though only two are really required for a story map. These are the conflict and resolution. Be sure to ask the students what the problem in the book is instead of just telling them. For example: "What happens in the book that is not so good?" "What goes wrong?" or simply, "what is the problem?" are good questions to ask. Another element to add to the plot is the event. What event sets the story into motion? In the book The Lotus Seed, the event is the emperor losing his golden dragon throne.
The setting is where the story takes place. Is it, for example, in a park, a classroom, or a basement?
The theme is always inferred, told straight out. This means that it is obvious. It is the big idea, moral or importance of the story. It recurs throughout the story. Some common themes are family, friendship, and life lessons.

Here is the story Map I created for the book The Lotus Seed. 


This isn't set up like a lot of story maps. I didn't title the plot, but instead put in the conflict and resolution. Also, I realize too late that I did not include a setting.  This is OK. The setting is not the most important element of a story map.

Here is a cut-out of the leaves I used for the Lotus flower. It folds in the middle so that it can open up.
I cut a bunch of these out and glued the tabs to the paper. DO NOT glue the whole back of the leaf to the  paper. 

The words do not have to be type-written. The can just as easily be written on the leaves. This is just how I did my story map; you can do whatever you want to change or improve it.


I hope you enjoyed this introduction to story maps. If there is something I forgot to add or anything I did that needs improvement, let me know! Also, if you would like to leave links to your own education blogs or websites, feel free to do so (I am hoping that any links will be HELPFUL so if you post a link just to get more traffic and your website really has nothing to do with crafts or education, I may remove it). 

Some other resources:
Story Map
Mrs. Goff's PreK Tales

The Purpose

Greetings! This blog has been created to serve as a resource for myself, other educators, and anyone who feels the need to look for creative ideas for education. Basically I need a place to store links, ideas, and tutorials. WARNING: I rely heavily upon Pinterest.

A little about myself: I am currently in the process of becoming an elementary teacher. Yes, I am still in college. This is my third year (2014). I really love crafts, and I can hardly wait to begin teaching. I also crochet, so I may once in a while post a crochet pattern or two.

 The reason I decided to create this blog is because I keep finding tons of lesson plans, crafts, and resources for teachers, and they are ALL OVER THE PLACE. I can't keep ten different folders on my computer and 23,900 bookmarked websites. It's too much to take in!

This Blog is not just for teachers! It is for parents, babysitters, and bored crafters. If you are a homeschooler, particularly of younger students, this might be a good place for you to visit.  I will post pictures of crafts and activities, lesson plans, and maybe youtube tutorials, depending on whether or not I get the time to make them. There will definitely be links to other websites where I have found my ideas.

I welcome resources and suggestions, so if you have anything to add, please do! I am (right now) just a college student, so I need as much help as I can get! I would appreciate it if you would share your own ideas, websites, or comments. 

I will hopefully be posting later today, as I have a wonderful story map that I created for Children's Literature that I would love to share with the world.


01 09 10